
Roof Flashing Leaks: Causes and Repair Process
Flashing is the metal or rubberised material that seals joints between roof sections and around penetrations. Failed flashing is the most common cause of roof leaks. This guide explains how flashing works, why it fails, the repair process, and why most flashing work should not be DIY.
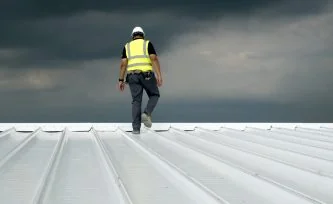
Call (02) 5850 0271Understanding Flashing Failure
Flashing creates weatherproof seals at the most vulnerable points on a roof. While roof sheets or tiles protect the main surface, flashing protects the junctions, valleys, ridges, penetrations, and transitions where water naturally collects. When flashing fails, leaks follow quickly, often causing extensive damage before homeowners notice any internal signs.
Most roof leaks traced back to flashing failure could have been prevented with proper material selection and installation. However, once flashing has failed, repair requires technical knowledge of water flow patterns, material compatibility, and safe roof access. This guide walks through what flashing does, why it fails, and how professional repairs restore protection.
What Roof Flashing Does
Flashing seals joints where two roof planes meet (valleys, ridges), where the roof meets walls or chimneys, and around penetrations like vents, skylights, and pipes. Without flashing, water would enter through every junction. Flashing materials include galvanised steel, Colorbond, lead, aluminium, and rubberised membranes depending on location and roof type. Each is designed to shed water away from the joint.
Valley flashing channels water down the intersection between two roof slopes. Ridge flashing caps the peak of the roof, protecting the gap between sheets or tiles. Wall and chimney flashings create a stepped or continuous seal where vertical surfaces meet the roof plane. Penetration flashings wrap around pipes, vents, and other protrusions, often combined with rubber boots or silicone collars. All flashing types rely on proper overlap, secure fixing, and intact sealant to function correctly.
Common Causes of Flashing Failure
Flashing typically fails before the surrounding roof material because it endures concentrated water flow and movement.
- Degraded silicone or sealant at flashing edges (typically 8 to 12 year lifespan from UV exposure)
- Lifted or distorted flashing from wind events
- Rust on galvanised flashing in coastal areas or after coating failure
- Movement of the roof material around the flashing causing gaps to open
- Poor original installation with insufficient overlap or wrong material choice
- Damage during other roof work (gutter cleaning, panel replacement) where flashings were knocked or lifted
Repair Process Overview
A typical flashing repair follows these steps. Most homeowners should not attempt this work themselves due to roof access risk and the technical knowledge required.
- Inspect the flashing thoroughly to identify the failure point. Surface damage may indicate deeper issues underneath.
- Remove the failed flashing carefully without damaging surrounding roof materials. This often involves lifting tiles or removing fasteners.
- Clean the substrate surface, removing old sealant, rust, and debris. A clean dry surface is essential for new flashing adhesion.
- Cut and shape new flashing to match the original profile. Custom shaping is often required around complex penetrations.
- Install the new flashing with proper overlap (typically 100mm minimum) and secure with appropriate fasteners or adhesive sealant.
- Apply high-quality silicone sealant at all edges and joints. Use products rated for roofing applications, not generic builders silicone.
- Reinstate the surrounding roof materials, ensuring proper overlap of tiles or sheets over the new flashing edge.
- Test the repair by flushing with water and inspecting from inside the roof cavity if accessible.
Why Flashing Repair is a Job for Professionals
Flashing repair requires safe roof access (often steep pitch or two-storey work), correct material selection, precise cutting, knowledge of installation overlap and water-flow direction, and the ability to inspect adjacent areas for additional damage. Incorrect flashing repair often makes leaks worse by channeling water in unintended directions. A professional repair typically costs between $500 and $2,500 depending on location and complexity, far less than the cost of repeated repairs or interior water damage from a botched DIY attempt.
When to Call a Professional Immediately
Some flashing failures need urgent attention. Active leaks during rain, visible daylight where flashing should seal, large gaps around chimney or skylight bases, and rust holes through metal flashing all warrant immediate professional response. Delay risks cavity damage, ceiling staining, electrical hazards, and mould growth. Most roofers can provide a temporary tarpaulin cover within 24 to 48 hours if needed, followed by permanent repair.
Even minor flashing damage should be addressed promptly. A small gap or lifted edge may seem insignificant, but concentrated water flow can rapidly erode surrounding materials and compromise structural timbers. Annual roof inspections often catch flashing issues before leaks develop, making preventive maintenance far more cost-effective than emergency repairs.
Have a flashing leak?
We provide inspection and professional repair across Wollongong and the Illawarra
Frequently asked questions
Quality flashing can last 20 to 40 years if installed correctly, but the sealant at flashing edges typically needs renewal every 8 to 12 years due to UV degradation. Coastal locations see faster deterioration from salt exposure, and galvanised flashing may rust through after 15 to 20 years in harsh conditions. Regular inspection helps identify when maintenance is needed before leaks develop.
Most flashing repairs are not suitable for DIY due to the combination of roof access risk, technical skill required for correct installation, and the consequences of improper repair. Incorrect flashing work often channels water into new problem areas or fails within months. Professional roofers have the equipment for safe access, knowledge of material compatibility, and experience reading water flow patterns. The cost of professional repair is typically far less than the cost of fixing DIY mistakes or repairing internal water damage.
External signs include visible rust or corrosion on flashing, lifted or distorted flashing edges, gaps between flashing and roof materials, missing or cracked sealant, and daylight visible through joints. Internal signs include water stains on ceilings near walls or chimneys, damp patches in roof cavities near valleys or penetrations, and active dripping during or shortly after rain. Even minor external damage should be inspected, as visible deterioration often indicates broader hidden failure.
Flashing repair costs typically range from $500 to $2,500 depending on location, extent of damage, accessibility, and materials required. Simple sealant renewal or minor flashing adjustment may cost $300 to $600, while full replacement of valley or chimney flashing with tile removal and reinstatement may reach $1,500 to $2,500. Emergency repairs or work requiring scaffolding or scissor lifts will increase costs. Most roofers provide free inspection and fixed-price quotes before beginning work.
The best flashing material depends on roof type, location, and budget. Colorbond steel is durable, corrosion-resistant, and suitable for most Australian roofs. Galvanised steel is economical but has shorter lifespan in coastal areas. Lead flashing is traditional for complex shapes and heritage roofs but expensive. Aluminium is lightweight and corrosion-resistant but softer and prone to damage. Rubberised membranes work well for low-pitch or flat roof penetrations. A qualified roofer will select the appropriate material for each application based on local conditions and roof design.
Roofing services related to this guide
Related roofing guides
If you have questions about your specific roof, call us on (02) 5850 0271
Email: info@wollongonglocalroofers.com.au
Mon - Sat • 7:00am - 7:00pm
Ready to protect your roof?